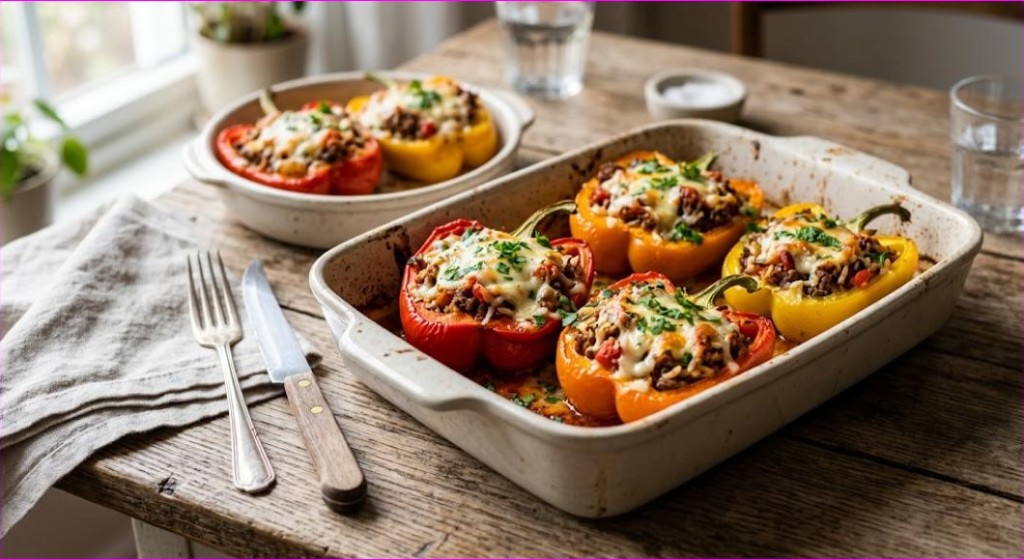
Stuffed peppers are a dish of timing mismatches. The pepper needs 45 minutes of heat to become tender, but the filling — already-cooked rice and browned meat — needs about 20 minutes to heat through. Bake them together for long enough to soften the pepper and the filling dries out. Bake them for the filling’s sake and you are eating a raw pepper.
The standard fix is par-cooking the peppers before stuffing them. Five minutes in boiling water, or ten in the oven, brings the pepper forward so that both components finish together. It also drains some of the water the pepper would otherwise release into the dish.
The second issue is the filling itself. Rice absorbs liquid, meat releases fat, and tomatoes bring water. Get the ratio wrong and the filling is either dry and crumbly or soupy. This recipe uses a ratio that has been tested to hold together and stay moist, and takes about 70 minutes to serve six.
- Prep25 min
- Cook45 min
- Total1 hr 10 min
- Serves6 servings
- CourseMain Course
- CuisineAmerican
Written by Anisha Akter · Updated 25 September 2026
Why This Stuffed Peppers Recipe Works
- Peppers are par-boiled for five minutes, so they finish tender at the same moment the filling is hot.
- The rice is cooked separately and slightly under-done, so it absorbs the remaining liquid during the bake instead of going mushy.
- Browning the meat properly before mixing builds flavour that seasoning alone cannot replace.
- The dish is covered for most of the bake, which steams the peppers tender, then uncovered so the cheese browns.
- A small amount of liquid in the base of the dish stops the pepper bottoms scorching.
Ingredients and Why They Matter
Red, orange and yellow peppers are sweeter than green and hold up slightly better. Full ingredient list below.
- 6 large bell peppers, tops cut off and seeds removed
- 1 lb (450 g) ground beef, 85/15
- 1 medium onion, finely diced
- 3 cloves garlic, minced
- 1 1/2 cups cooked white rice (slightly under-cooked)
- 14 oz (400 g) can diced tomatoes, drained
- 2 tbsp tomato paste
- 1 tsp dried oregano
- 1 tsp smoked paprika
- 1/2 tsp red pepper flakes
- 1 tbsp Worcestershire sauce
- 1 1/2 cups (170 g) shredded mozzarella or cheddar, divided
- 1/2 cup (120 ml) beef stock or water, for the dish
- Salt and freshly ground black pepper
- Fresh parsley, chopped, to serve
Key Ingredient Notes
Large, evenly shaped peppers. Pick peppers that sit flat on their base so they do not tip over and spill. Trim a sliver off the bottom of any that wobble, but do not cut through, or the filling leaks out.
85/15 ground beef. Leaner beef dries out over a 45-minute bake with nothing to protect it. 85/15 has enough fat to stay juicy. 80/20 works too if you drain it well after browning.
Slightly under-cooked rice. Rice cooked to perfection before baking turns to paste after another 45 minutes in a moist environment. Pull it two or three minutes early and let it finish absorbing liquid inside the pepper.
Drained canned tomatoes. The tomatoes are for flavour and body, not liquid. Draining them off removes the main source of the watery filling most people end up with. Save the juice for the bottom of the dish if you like.
Step-by-Step Instructions
- Bring a large pot of salted water to the boil. Heat the oven to 375°F (190°C).
- Cut the tops off the peppers and remove the seeds and white ribs. Chop any usable flesh from the tops and set aside.
- Boil the peppers for 5 minutes, then drain them upside down on a rack. This par-cooks them and drains the water from inside.
- Brown the ground beef in a large skillet over medium-high heat for 6 to 8 minutes, breaking it up. Drain off the excess fat, leaving about a tablespoon.
- Add the onion and the chopped pepper trimmings and cook 5 minutes until softened. Add the garlic and cook 30 seconds more.
- Stir in the tomato paste and cook 2 minutes until it darkens.
- Add the drained tomatoes, oregano, smoked paprika, red pepper flakes and Worcestershire. Simmer 5 minutes.
- Take the pan off the heat and stir in the cooked rice and 1/2 cup of the cheese. Taste and season well with salt and pepper — peppers mute seasoning, so be assertive.
- Stand the drained peppers upright in a baking dish that holds them snugly so they support each other. Pour the stock into the base of the dish.
- Fill each pepper generously, mounding the filling slightly above the rim.
- Cover the dish tightly with foil and bake for 30 minutes.
- Uncover, top each pepper with the remaining cheese, and bake 12 to 15 minutes more until the cheese is melted and browned and a knife slides easily into the side of a pepper.
- Rest 5 minutes, scatter with parsley, and serve.
Common Mistakes and How to Avoid Them
Not par-cooking the peppers Raw peppers need 45 to 55 minutes to soften, by which time the filling has dried out. Five minutes in boiling water brings them forward so everything finishes together.
A watery filling Undrained canned tomatoes, raw vegetables and fully cooked rice all add water. Drain the tomatoes, cook the aromatics first, and under-cook the rice.
Under-seasoning A whole bell pepper around the filling dilutes the seasoning considerably. Season the filling until it tastes slightly too salty on its own — it will be right once assembled.
Baking uncovered the whole time Without foil, the exposed filling dries into a crust and the pepper takes longer to soften. Cover for the first thirty minutes so steam does the work, then uncover to brown.
Tips for Best Results
- Use a dish that fits the peppers snugly. Peppers with room to lean fall over and spill their filling.
- If you prefer a softer pepper, par-boil for seven minutes instead of five.
- Cutting the peppers in half lengthwise and stuffing the halves is faster, cooks more evenly, and looks good on a plate. It also serves more people from the same number of peppers.
- A tablespoon of grated Parmesan mixed into the filling adds savoury depth that mozzarella alone does not.
- Leftover filling freezes well and makes a good base for a quick stuffed zucchini or a rice bowl.
Variations to Try
Italian stuffed peppers. Swap the beef for Italian sausage, add fresh basil, and use marinara in place of the diced tomatoes. Top with mozzarella and Parmesan.
Vegetarian stuffed peppers. Replace the beef with black beans, corn and diced mushrooms, sauteed until dry. Add cumin and chili powder for a Southwestern profile.
Low-carb stuffed peppers. Use cauliflower rice in place of white rice. Squeeze it dry after cooking, since it holds a lot of water.
Greek stuffed peppers. Use ground lamb, add cinnamon and dill, and finish with feta instead of mozzarella.
Storage, Freezing and Reheating
Refrigerate in an airtight container for up to 4 days. The peppers soften further but the flavour holds well.
Reheat covered in a 350°F oven for 20 minutes, or in the microwave for 3 minutes.
Freeze cooked stuffed peppers individually wrapped for up to 3 months. Thaw overnight and reheat covered at 350°F for 30 minutes. The pepper texture softens noticeably after freezing.
What to Serve With It
Frequently Asked Questions
Do I need to boil the peppers first?
It is strongly recommended. Par-boiling for five minutes means the peppers finish tender at the same time the filling is hot. Skipping it leaves you choosing between crunchy peppers and dried-out filling.
Why is my stuffed pepper filling watery?
Undrained tomatoes or raw vegetables in the filling. Drain the tomatoes well, cook any vegetables before mixing, and use slightly under-cooked rice that will absorb the remaining moisture.
Can I make stuffed peppers ahead?
Yes. Assemble them completely, cover and refrigerate for up to two days, then bake adding about ten minutes to the covered time.
What colour bell peppers are best?
Red, orange and yellow are sweeter and milder. Green peppers are more bitter and slightly firmer, which some people prefer for a more savoury dish. Any colour works.
Can I use uncooked rice in the filling?
Only if you add enough liquid for it to cook — about twice its volume — and extend the covered bake to 50 minutes. Cooked rice is far more predictable.
How do I stop the peppers falling over?
Pack them tightly in a dish that just fits them, so they support one another. Trim a thin sliver off the base of any that wobble, being careful not to cut through.

Hi! I’m the creator of scooks (Simple Cooks).I share easy, practical recipes and simple cooking ideas to help you enjoy everyday home cooking with confidence.
Happy cooking! 🍽️