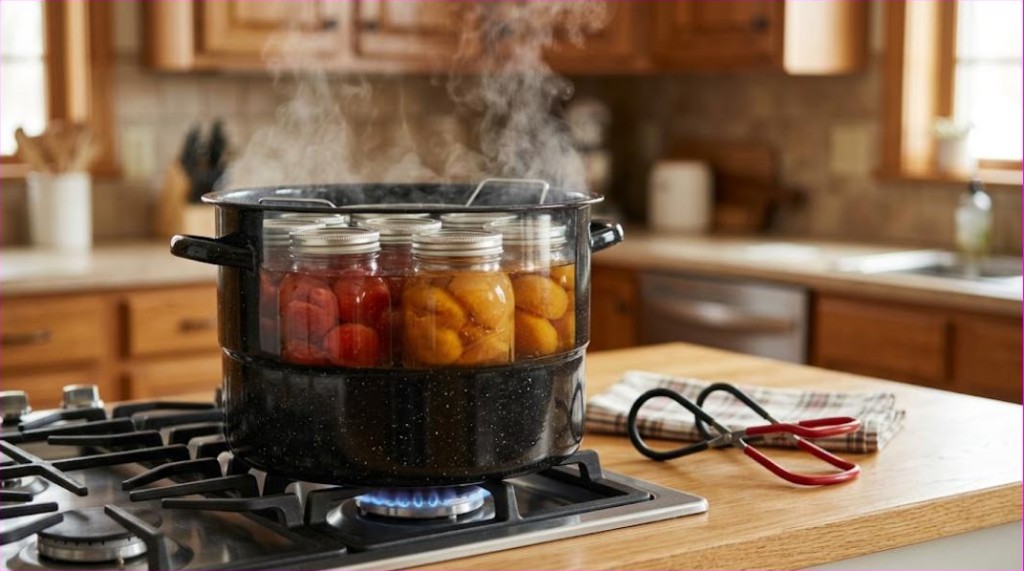
Water bath canning is the entry point into home preserving — it’s the method used for high-acid foods like jams, pickles, and tomatoes, and doesn’t require the pressure equipment that low-acid canning does. A good beginner canner mostly comes down to having enough depth to fully submerge jars and a rack to keep them off the direct heat of the pot’s bottom.
What Actually Matters
Depth is the specification that rules everything out
Jars must be covered by one to two inches of water throughout processing, and the pot needs a few more inches above that so it does not boil over. That means a canner has to be considerably deeper than it looks necessary. A pot that cannot achieve this margin with your tallest jars is not usable for canning, no matter how large its diameter.
A rack is not an accessory
Jars resting directly on the base sit in the hottest part of the pot and can crack from uneven heating, and water cannot circulate underneath them. A rack lifts them clear and lets heat move evenly around the glass. If a pot is sold without one, budget for a rack as part of the purchase rather than as an optional extra.
What water bath canning can and cannot preserve
This method only reaches the temperature of boiling water, which is sufficient for high-acid foods such as jams, pickles, fruit and properly acidified tomatoes. Low-acid foods including most vegetables, meats and soups require pressure canning to reach temperatures that eliminate the risk of Clostridium botulinum. This is a genuine food-safety boundary, not a preference. The USDA’s National Center for Home Food Preservation publishes tested recipes and processing times worth following exactly.
The Main Types and Who Each One Suits
Enamel-on-Steel Canner
The classic blue-speckled canner most associated with home canning, lightweight and affordable, with a wire rack that keeps jars elevated and lets water circulate underneath.
- Suits: First-time canners on a budget.
- Key features: Enamel-coated steel body, included wire rack, lightweight for its size.
Stainless Steel Canner
A more durable, often heavier alternative to enamel that resists chipping and works reliably on induction stovetops, which many enamel canners don’t.
- Suits: Long-term use and induction stovetop compatibility.
- Key features: Stainless steel construction, induction-safe, resistant to chipping and rust.
Multi-Use Stockpot Canner
A large stockpot that doubles as a canner when fitted with a separate rack, useful if you don’t want a single-purpose appliance taking up storage space.
- Suits: Cooks who want a pot that earns its keep beyond canning season.
- Key features: Dual-purpose stockpot, rack sold separately or included, versatile beyond canning.
Canner with Rack and Jar Lifter Set
Bundles the pot with the two accessories beginners most often forget to buy separately — a jar rack and a rubber-gripped jar lifter for handling hot jars safely.
- Suits: First-time buyers who want everything in one purchase.
- Key features: Included jar lifter, included rack, beginner-friendly all-in-one set.
Induction-Compatible Canner
Specifically designed with a flat, magnetic-responsive base to work on induction cooktops, which many traditional thin enamel canners struggle with.
- Suits: Households with induction stoves.
- Key features: Induction-safe flat base, usually stainless steel, consistent heating.
Granite-Look Speckled Canner
A stylistic variation on the classic enamel canner with a mottled granite-style finish, functionally similar but often marketed as a more attractive kitchen piece.
- Suits: Canners who want their equipment to double as a display piece.
- Key features: Speckled enamel finish, standard rack included, similar performance to classic enamel.
All-in-One Canning Kit
Bundles the canner pot with a full starter set: rack, jar lifter, funnel, magnetic lid lifter, and bubble remover, aimed squarely at complete beginners.
- Suits: Canning from zero with no existing equipment.
- Key features: Complete tool bundle, beginner instructions often included, best overall starter value.
What I Use and Why
My first canner was a thin enamel one, and it worked fine on a gas hob and not at all when I moved to an induction cooktop, which I had not thought to check. That is now the first thing I would tell anyone to verify.
The other lesson was about altitude. Processing times in most recipes assume sea level, and I live high enough that they need adjusting upward. I processed a first batch of jam to the printed time and only later learned the seals were less reliable than they should have been for where I live.
How to Choose
Before comparing specific models, it helps to narrow the field on these points:
- Depth — jars need at least 1-2 inches of water above their lids
- Included rack to prevent jars from touching the pot bottom directly
- Material — enamel-on-steel is classic and budget-friendly; stainless steel lasts longer
- Compatibility with your stovetop, especially induction
- Whether a jar lifter and other basic tools are included
Make sure whatever pot you choose is deep enough that jars can sit on the rack with 1-2 inches of water covering their lids, with a couple more inches of headroom to prevent boil-over. If you cook on an induction stovetop, check compatibility specifically — many classic thin enamel canners don’t heat reliably on induction. A rack is non-negotiable; jars sitting directly on the pot’s bottom can crack from uneven heat.
Care and Common Mistakes
Do not let jars touch each other or the pot wall during processing. Contact points heat unevenly and are where cracks start.
Let jars cool undisturbed for twelve to twenty-four hours before testing seals, and do not press the lids while they are cooling. Interrupting the cooling is a common cause of seal failure.
Store enamel canners completely dry. Chips in the enamel expose the steel underneath, which then rusts, and a chipped canner deteriorates quickly once moisture gets in.
Frequently Asked Questions
What foods can I safely can in a water bath canner?
Water bath canning is safe for high-acid foods — jams, jellies, pickles, fruit, and properly acidified tomatoes. Low-acid foods like most vegetables and meats require pressure canning instead to safely reach the higher temperatures needed to eliminate botulism risk.
Do I need a special pot, or can I use any large stockpot?
You can use any stockpot deep enough to submerge jars under 1-2 inches of water, as long as you add a rack to keep jars off the direct heat of the bottom — a dedicated canner just comes with this built in.
How long do jars need to process in a water bath canner?
Processing times vary by recipe and jar size, typically ranging from 10 to 30+ minutes, and should always follow a tested, current recipe from a reliable source rather than guesswork, since under-processing is a genuine food safety risk.

Hi! I’m the creator of scooks (Simple Cooks).I share easy, practical recipes and simple cooking ideas to help you enjoy everyday home cooking with confidence.
Happy cooking! 🍽️